
This is a step by step guide on how to do a rebate for a glass door insert (note this is guide all the sizes in this article are example sizes only)
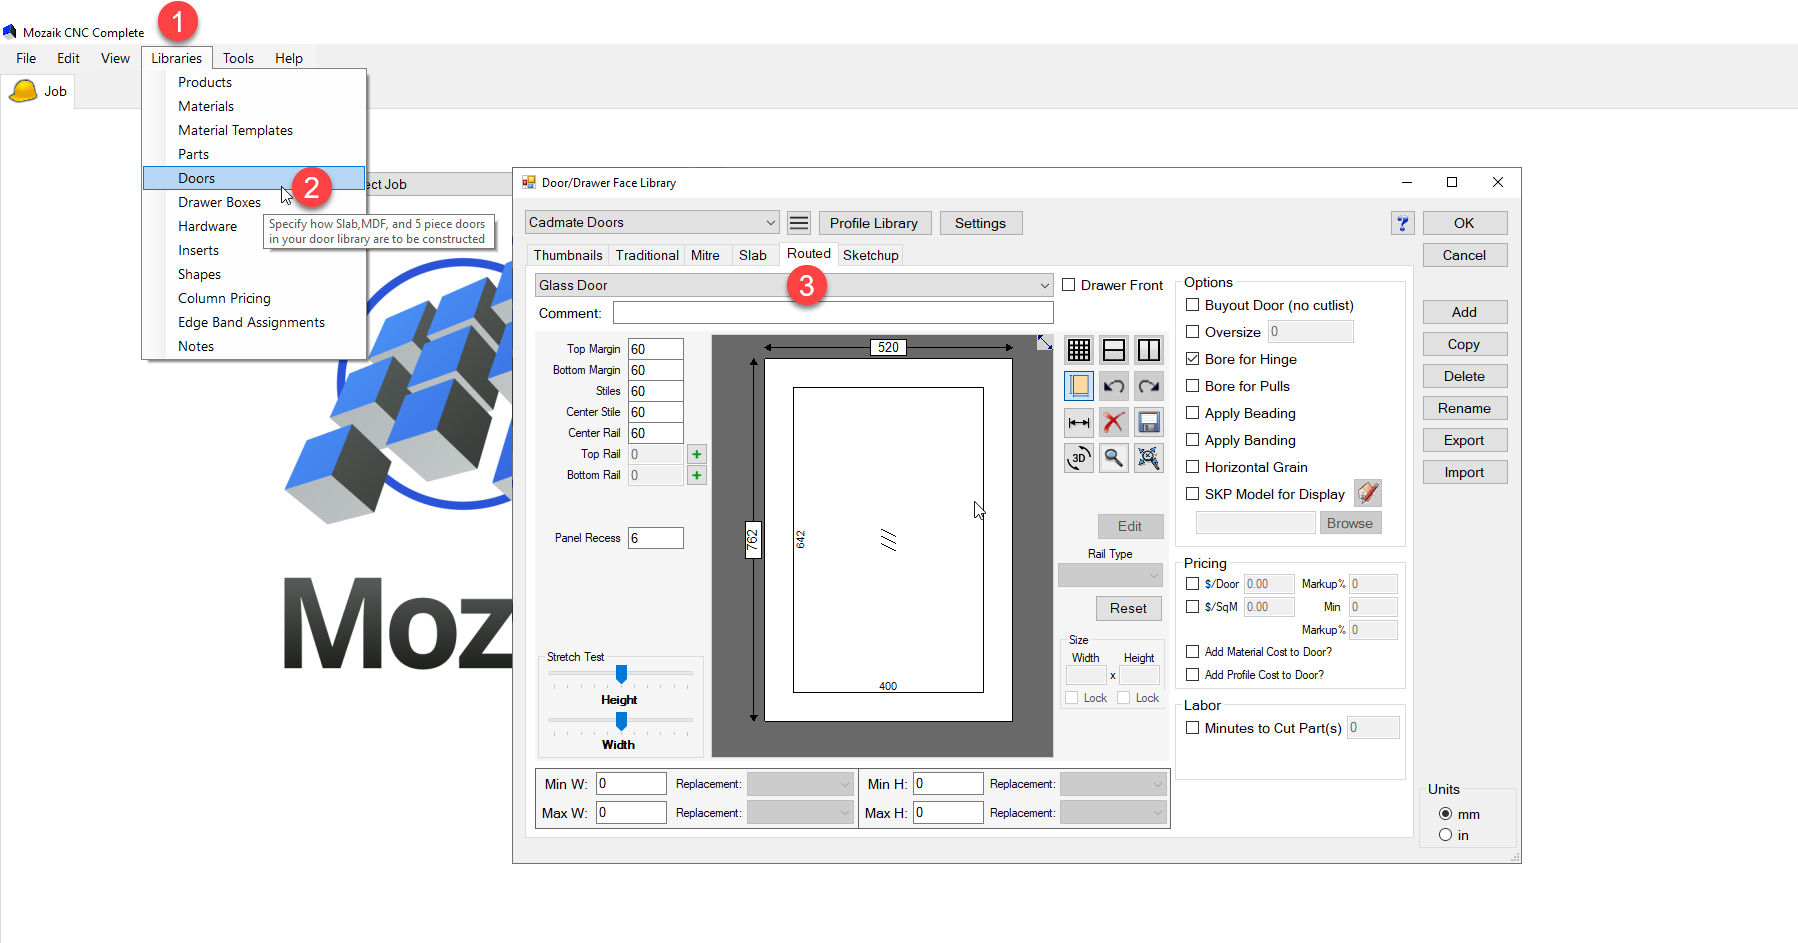
- Firstly we are going to go to the door library, go to the top of your screen click on the Libraries tab then scroll down to doors. Once we are in here we are going to go to the Routed Tab as soon in the screenshot below
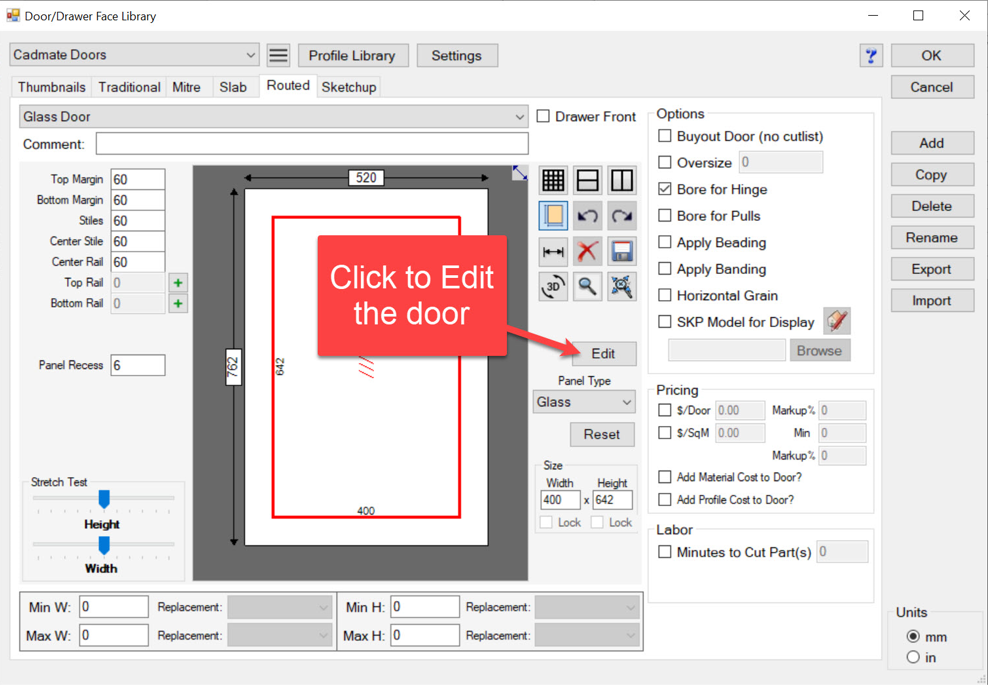
- Next we are going to click into the centre of the door so it is highlighted, then click on the Edit button
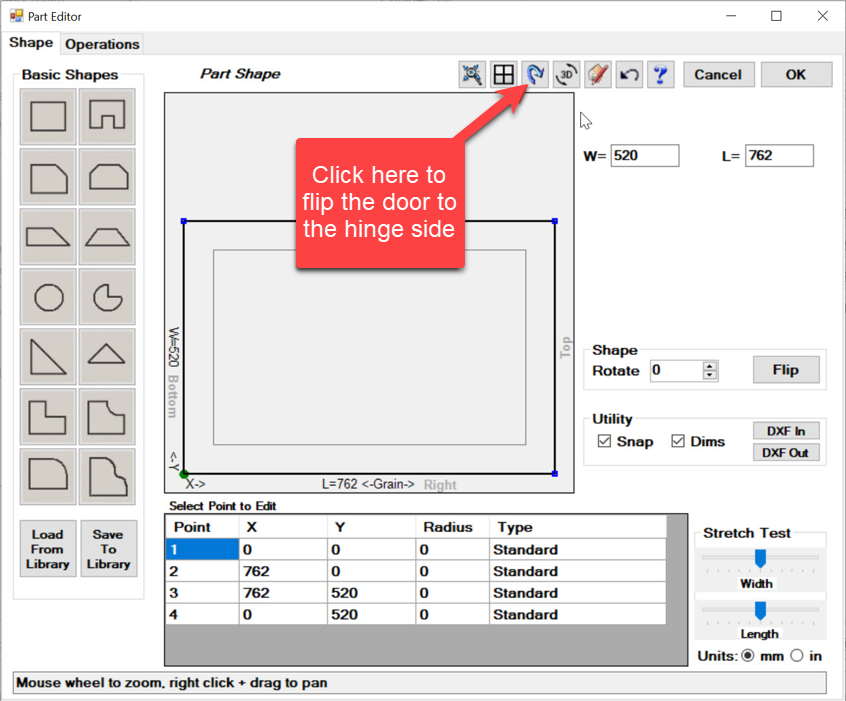
- This is going to open up the Part Editor Tab, in here the first thing we are going to do is flip the door over so the operations we do are going to be on the same side as the hinge so we won't need to flip the door when it comes to optimising.
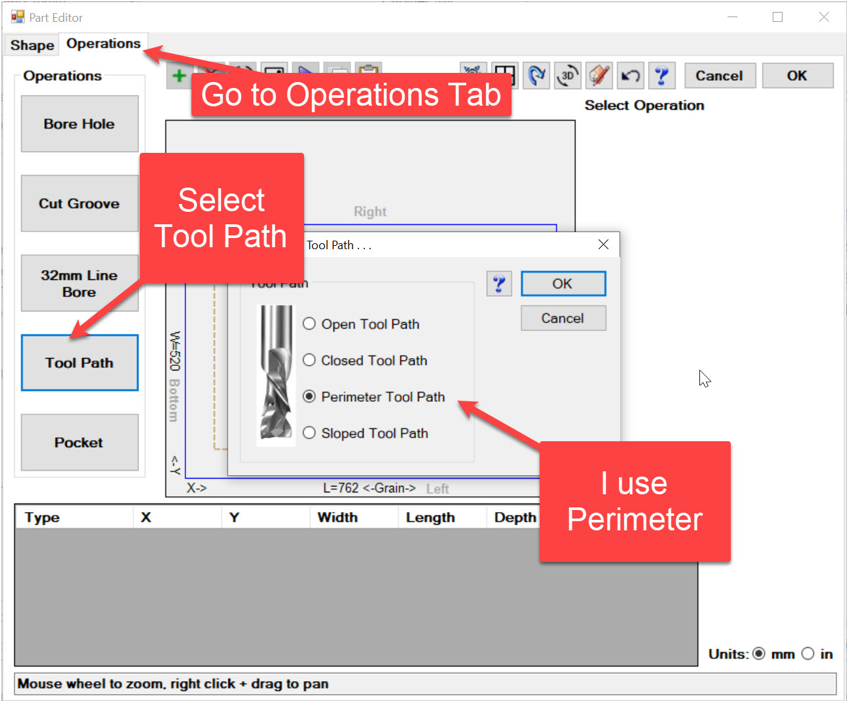
- We are now going to start adding in some operations, firstly click on the operations tab then select tool path, i use a perimeter as this is going to give a tool path on the perimeter of the door and we can then adjust this from that starting point
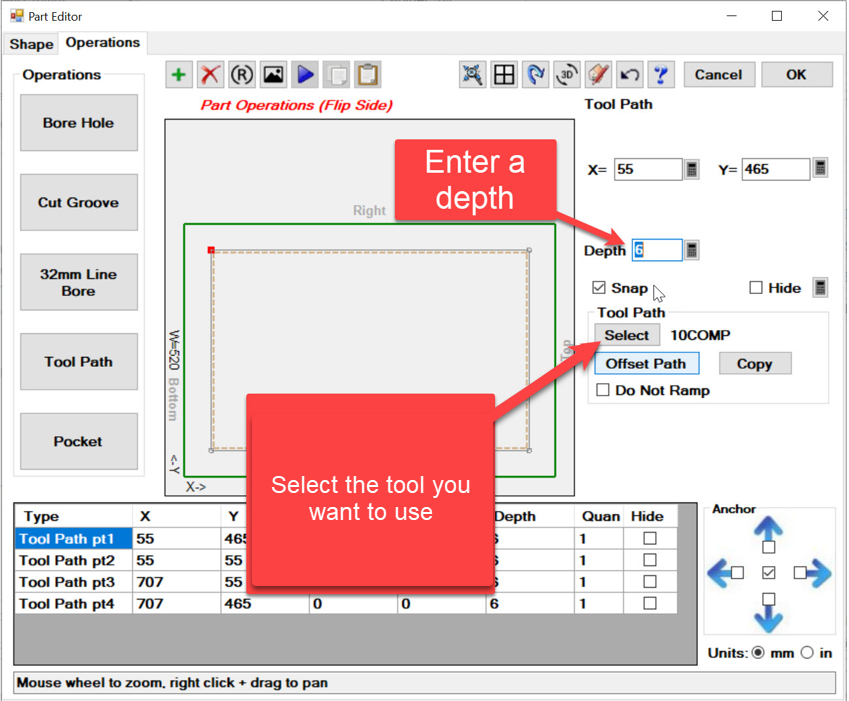
- We are now going to offset this toolpath from the perimeter, select the offset path button and enter in the amount you want to adjust the toolpath, important to note that + number will make the toolpath larger and a - number will make the toolpath smaller, so we are going to type in a - number. Also important that this is the centre line of the tool

- We are then going to select the tool we want to use for this rebate and also the depth we want it to go.
The door is now complete and is ready to be used in your job