1. Start by navigating to the 3D View
2. Rotate your view and zoom in/out until you have the view in the perspective you are happy with (tip - you can also turn layers such as walls on/off to make it easier to see a particular part of your drawing).
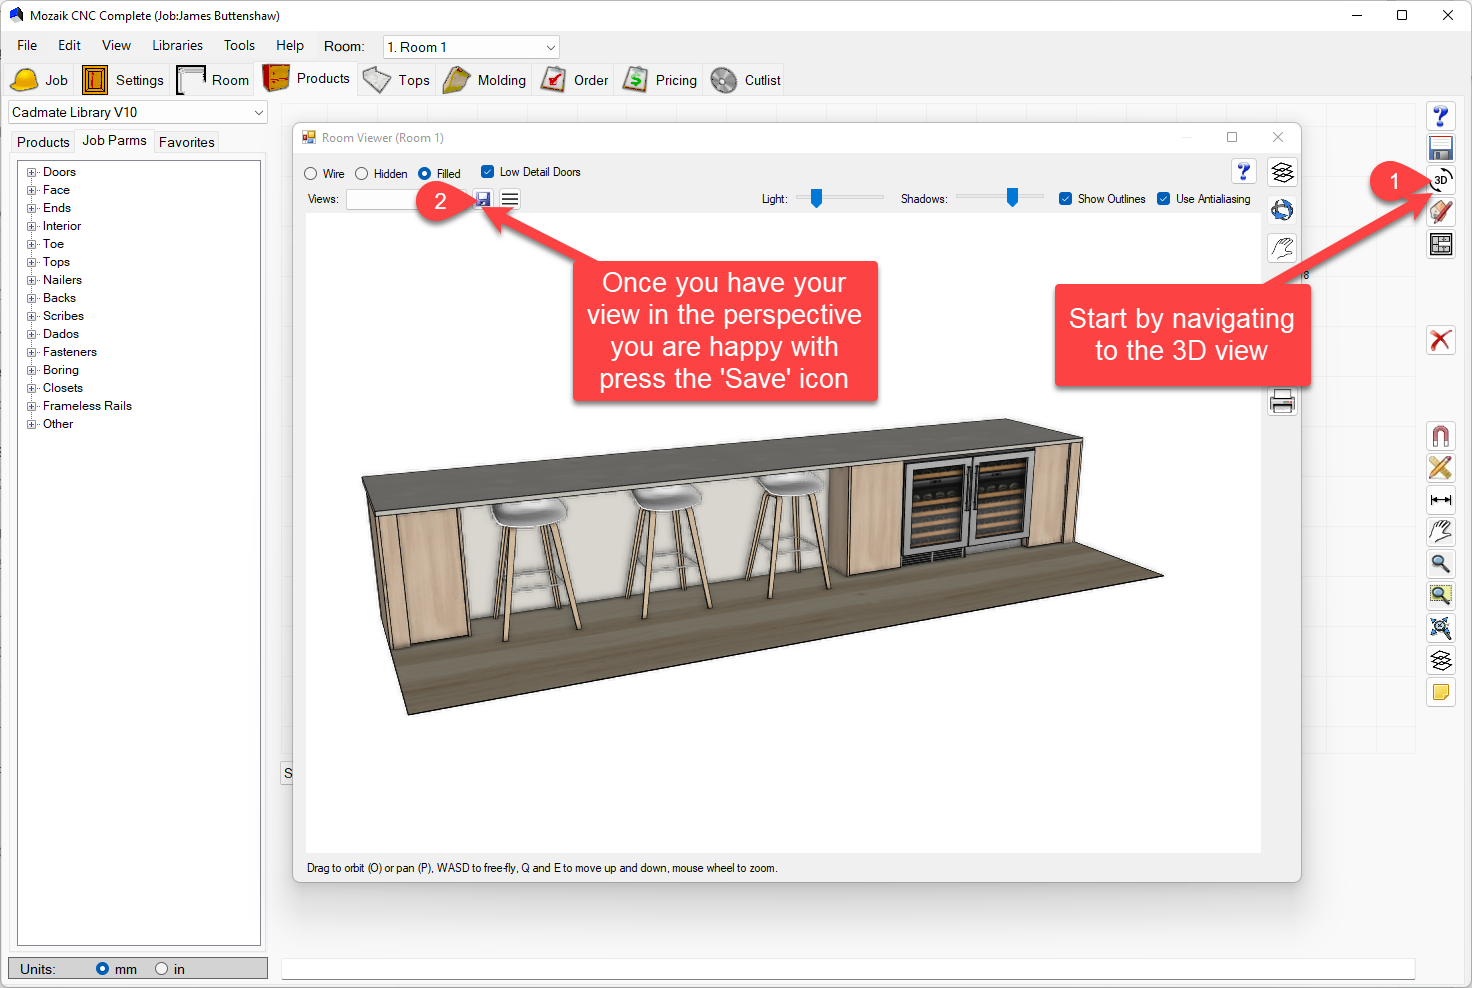
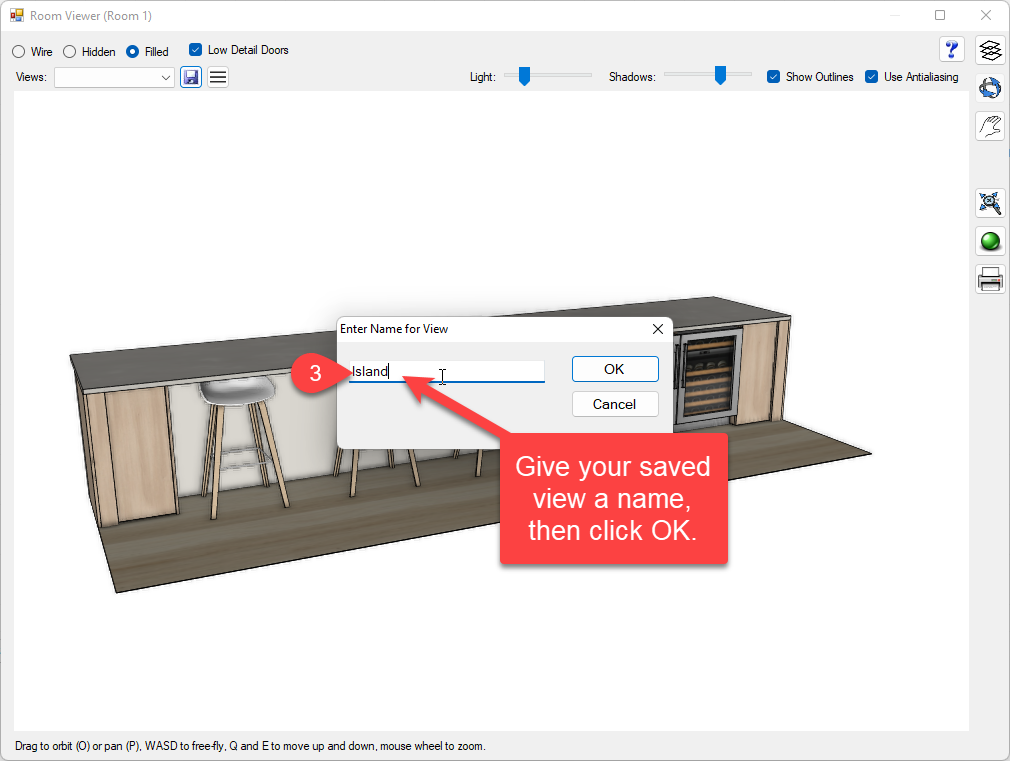
3. Enter a name for your view. Descriptive names make it easier to find in MutliPrint.
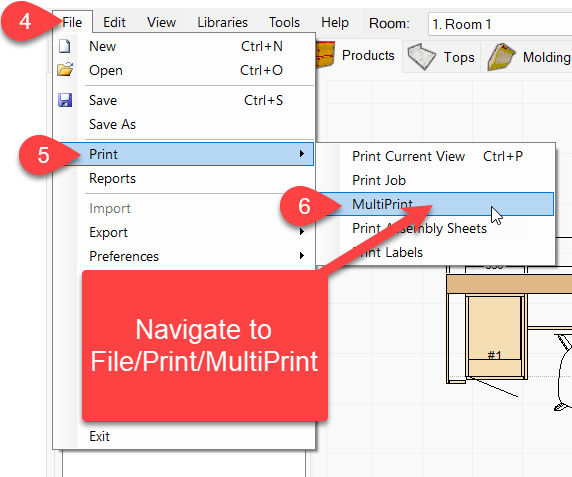
4. Navigate to the File menu
5. Select Print
6. Select MutliPrint
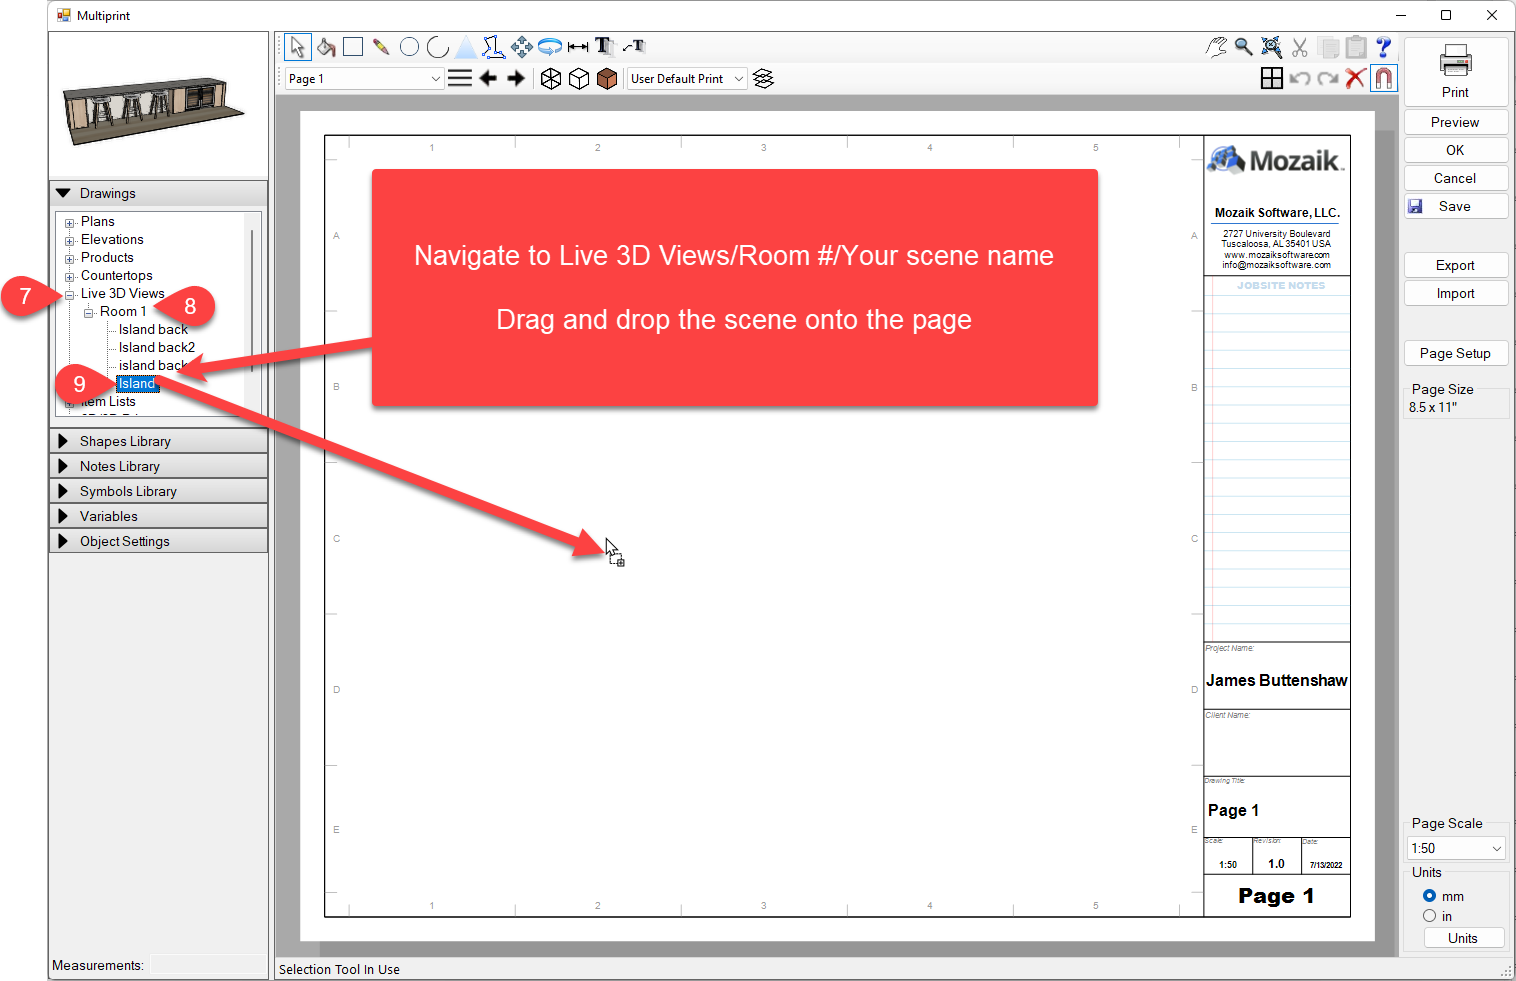
7. Branch open "Live 3D Views"
8. Branch open the Room number you're working on
9. Select the scene name that you saved in step 3 and drag and drop it onto the page
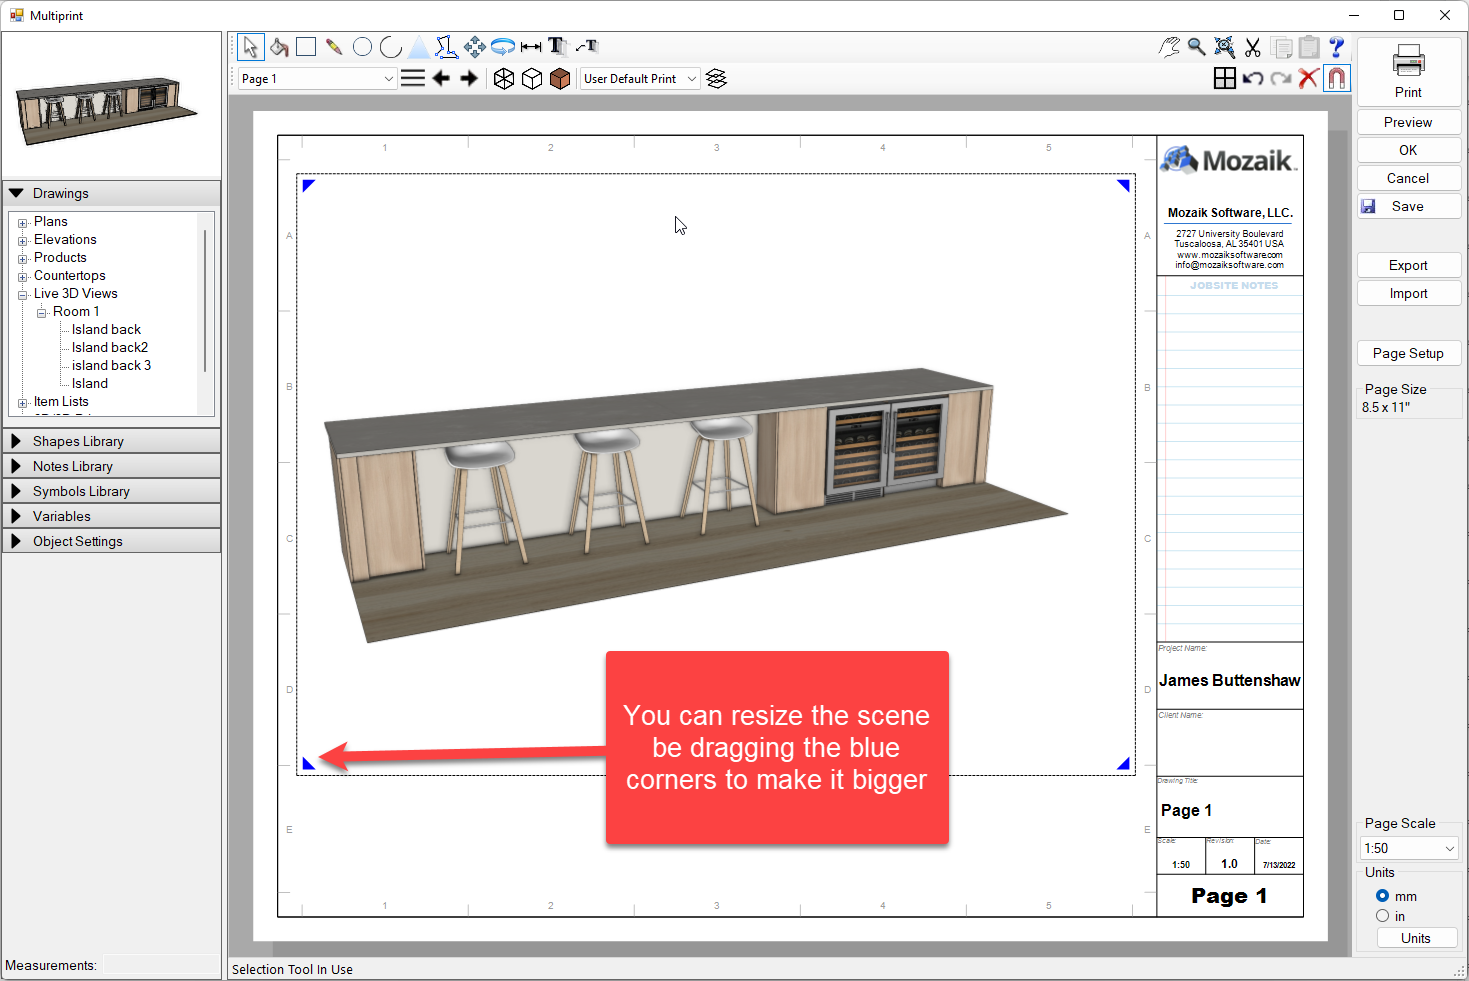
10. The final step is to resize the image to fit the page by dragging the blue corners that appear after you click on the image.